DIY Light Box
I don’t claim to be any kind of photographer, but I do need to take photos for this blog, as you may have noticed. I’ve never been too happy with the lighting when it comes to the pictures that have appeared here, so I considered getting some kind of light box to take the photos with. But before I put out any kind of money, I went searching on the boards and was pretty interested in a DIY Light box that I found there. The photo on Pinterest looks like this:

Photo courtesy of Ninth and Bird
The parts were easy to assemble, and in the end, cost much less than a store-bought light box. In all, the project cost less than $10.
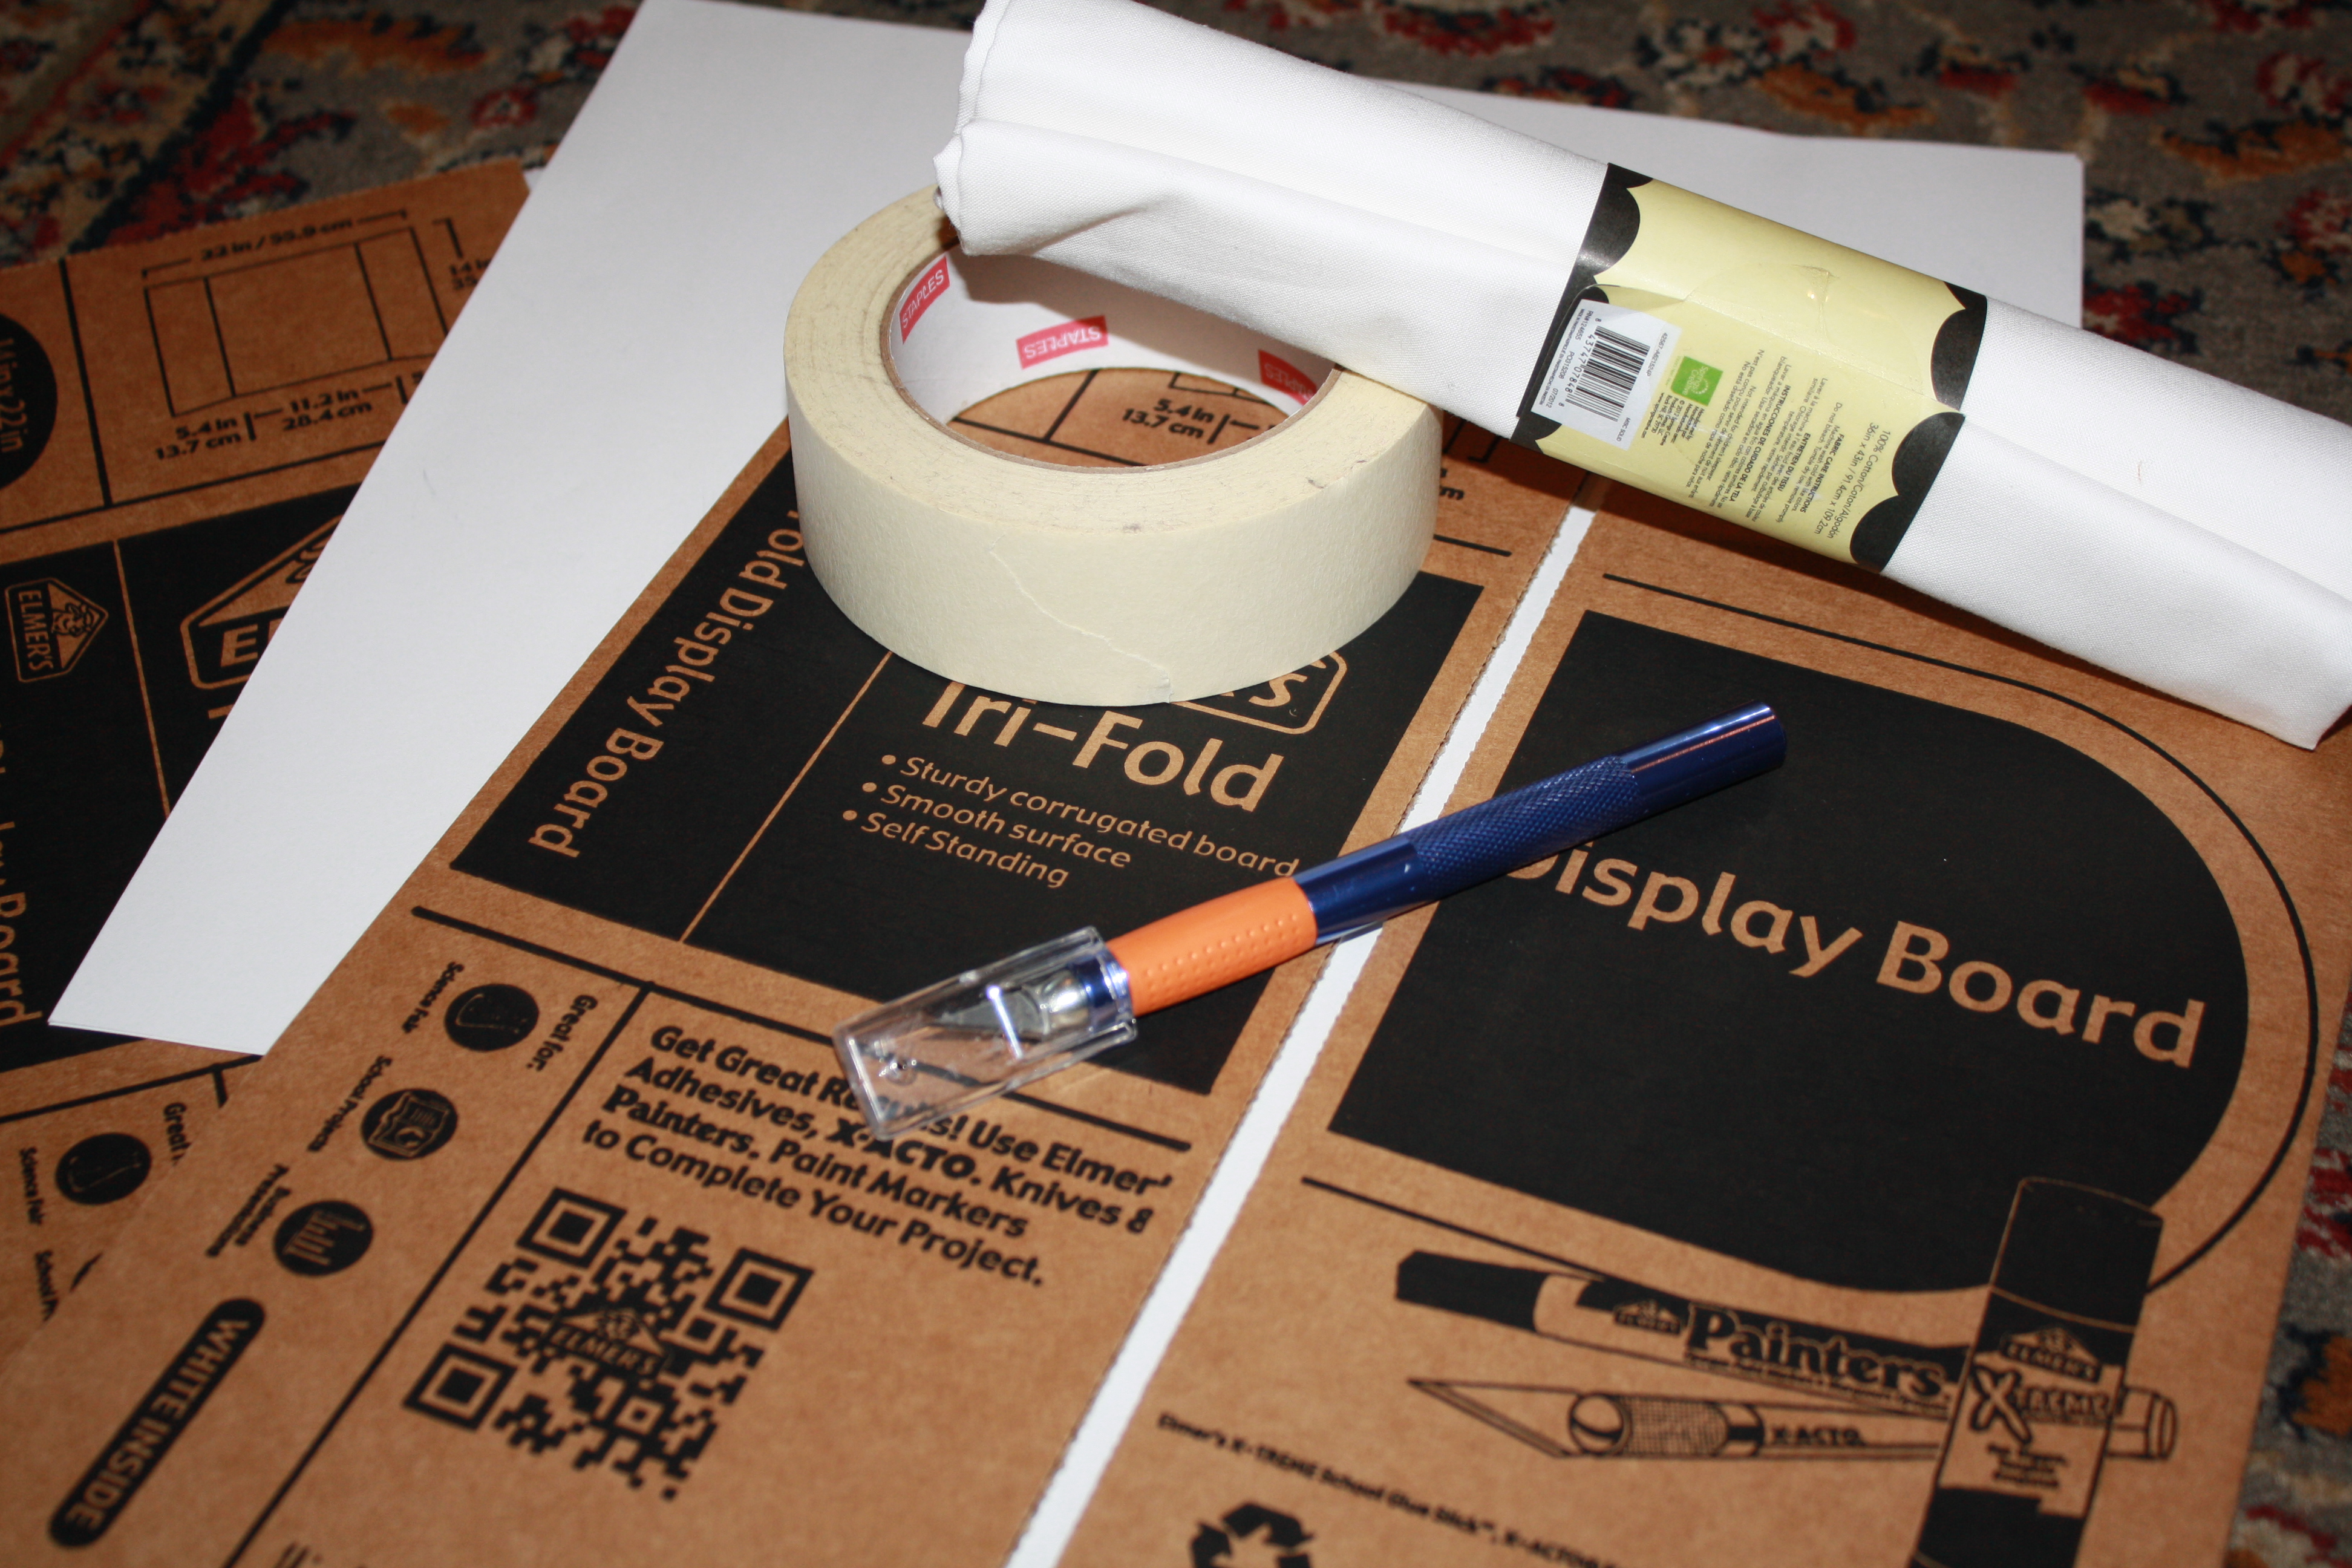
Materials needed:
- 2 tri-fold display boards
- a yard or so of white muslin fabric
- white posterboard or scrapbook paper
- glue, scissors, Exacto-blade, masking tape
- A lamp with natural light
-
Black Duct tape (optional)
First, I took the two tri-fold display boards. The only ones I could find locally were the larger ones that you might use in a science fair project., but I did find 14×22″ ones online. These were measured and cut two inches from each side to make the frame.


Then, I taped the two frames together with masking tape to make the frame of the box. For the front of the box, I cut the hole a little larger and used a piece of white scrapbook paper as the bottom of the light box.

Then the muslin was cut to fit the open squares and attached to the box with masking tape.

Instead of posterboard on the inside as Ninth and Bird used, I lined the inside of the box with my remaining muslin fabric. On top of the box I used a natural light lightbulb.

Then, I covered the cardboard parts with black Duct tape, just to make it more aesthetically pleasing, but of course, that’s optional.

The photos that were taken inside the box were great!!

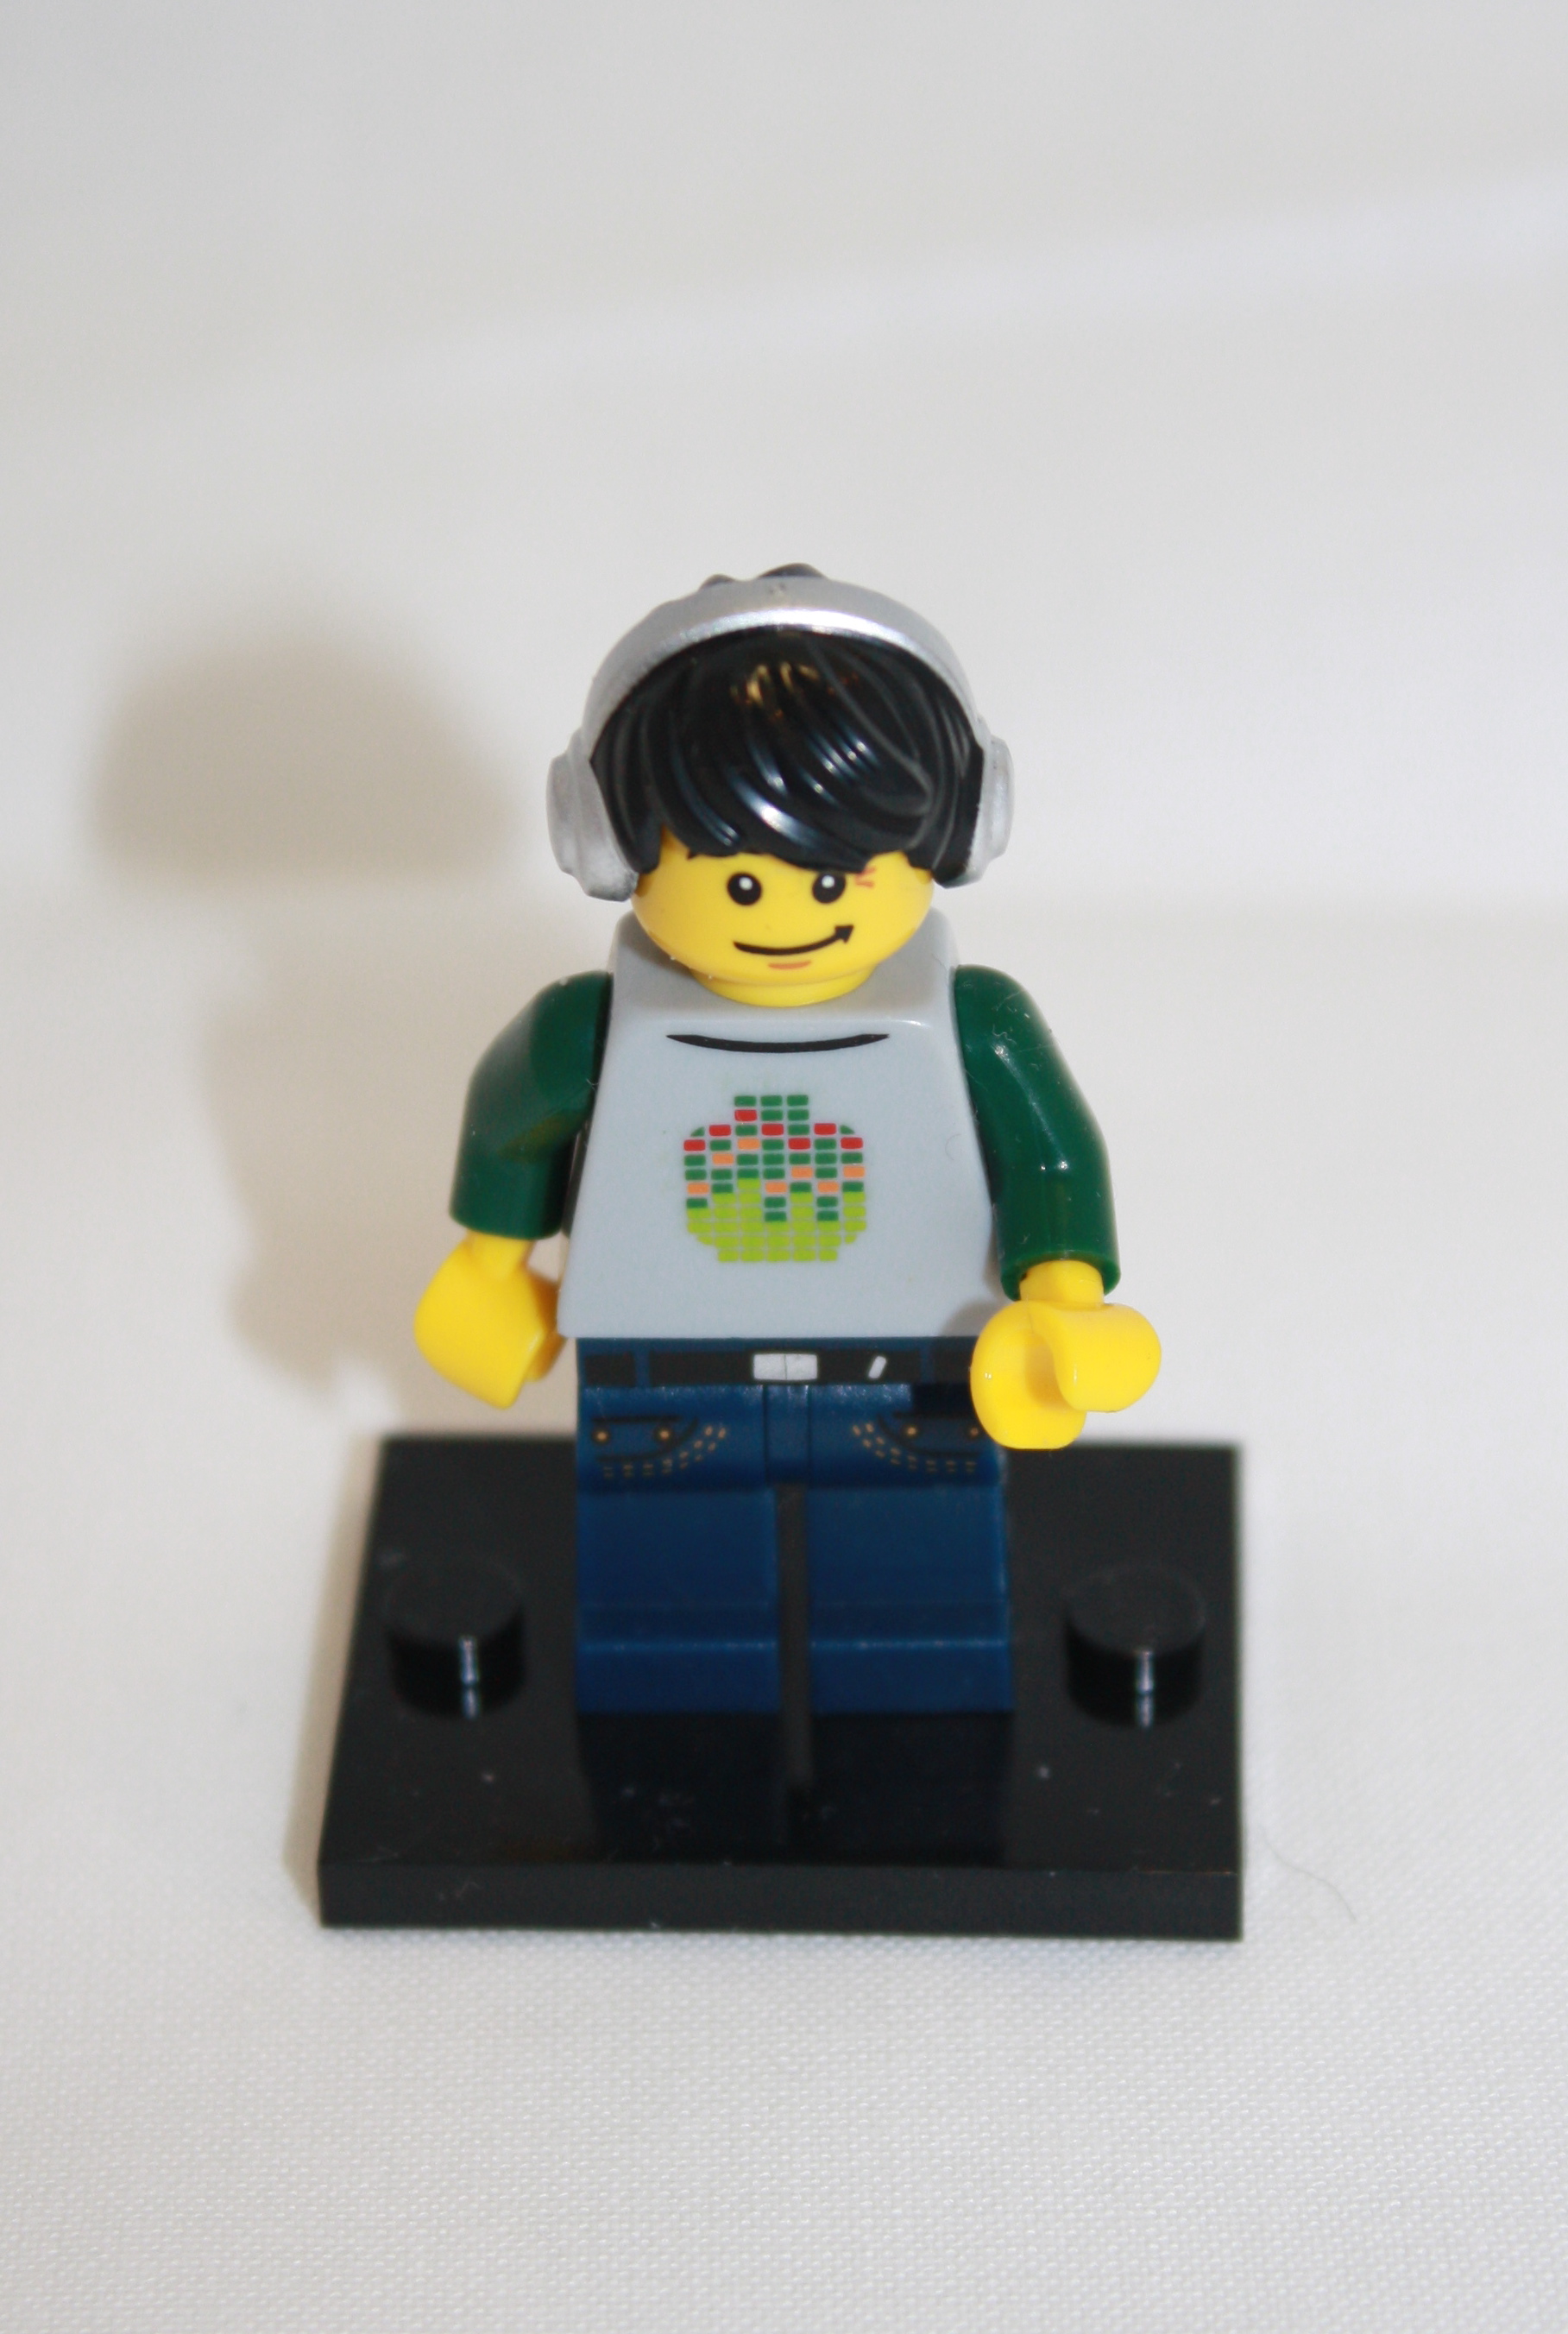
Overall, I am very pleased with my homemade light box. Just remember to be careful with your Exacto-knife!

